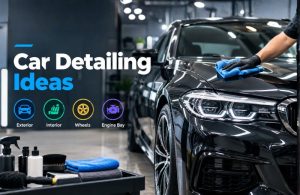

Paying for professional detailing every few months adds up fast. A single full-service detail can run well over $150, and most cars need one every six to eight weeks to stay in top shape. That’s where diy car detailing comes in.
Building your own detailing kit lets you get showroom-quality results without the recurring bill. You choose the products, control the quality, and learn skills that protect your car’s value for years. More car owners are turning to DIY detailing because it’s affordable, satisfying, and surprisingly easy to learn with the right supplies.
In this guide, you’ll learn exactly what belongs in a DIY car detailing kit, how to build one on any budget, the correct step-by-step process professionals use, and the mistakes that trip up most beginners.
Looking to build the perfect detailing setup? Explore our Car Detailing Kit Guide to learn how to choose the right tools, cleaning products, and accessories for every stage of vehicle care. Whether you’re a beginner or a professional detailer, this complete guide will help you create an effective kit for cleaning, protecting, and maintaining your car with confidence.
What Is DIY Car Detailing?
DIY car detailing means cleaning, correcting, and protecting your vehicle yourself, using consumer-grade tools and products instead of hiring a professional shop. It goes beyond a basic car wash detailing covers the paint, wheels, glass, interior, and trim, to restore and protect every surface.
Benefits of DIY detailing include:
- Lower long-term cost compared to professional services
- Flexible scheduling — detail whenever it fits your week
- Full control over which products touch your paint
- A deeper understanding of your vehicle’s condition
DIY vs. professional detailing comes down to time, equipment, and skill level. Professionals use commercial-grade tools and years of experience to work faster and correct serious paint defects. DIY detailing, done consistently and correctly, can maintain that same level of shine for daily maintenance and light correction.
Who should build a DIY detailing kit? Anyone who owns a vehicle and wants to protect its finish first-time car owners, weekend hobbyists, budget-conscious drivers, and enthusiasts who enjoy the process as much as the results.
Why Build Your Own DIY Car Detailing Kit?
Cost savings. A quality starter kit typically pays for itself after one or two skipped professional visits, then keeps saving you money every wash after that.
Customization. You pick products suited to your paint color, climate, and vehicle type something a one-size-fits-all detailing package can’t offer.
Better product quality. Many professional-grade products are sold directly to consumers now, so you’re not limited to whatever’s on a drugstore shelf.
Long-term vehicle protection. Regular at-home detailing catches contamination, swirl marks, and fading trim before they become expensive problems.
Convenience. No scheduling, no drop-off, no waiting for details on your own time.
Skill building. Every wash teaches you more about paint care, giving you the confidence to tackle small corrections and protection steps professionals normally charge extra for.
Essential DIY Detail Products
A solid car detailing kit starts with the basics. Here’s what every DIY kit should include, along with how to use each item correctly.
Car Shampoo
Purpose: Lifts dirt and grime from the paint without stripping wax or sealant.
Benefits: A pH-neutral formula cleans safely without damaging protective coatings.
How to use: Mix with water per the label, apply with a wash mitt from top to bottom.
Beginner tip: Never use dish soap it strips protection and dries out rubber seals.
Wash Mitt
Purpose: Safely lifts dirt off the paint surface during hand washing.
Benefits: Microfiber or sheepskin mitts trap grit instead of grinding it into the clear coat.
How to use: Rinse frequently in your wash bucket while washing in straight lines.
Beginner tip: Avoid sponges they hold grit against the paint and cause fine scratches.
Wash Bucket & Grit Guard
Purpose: Separates dirty rinse water from clean soapy water.
Benefits: The two-bucket method dramatically reduces swirl marks over time.
How to use: Rinse your mitt in the plain water bucket before reloading it with soap.
Beginner tip: The grit guard at the bottom traps sediment so it doesn’t cling back onto your mitt.
Microfiber Towels
Purpose: Dry, buff, and wipe surfaces without scratching.
Benefits: Soft, absorbent, and reusable far safer than cotton towels.
How to use: Use separate towels for paint, glass, and wheels to avoid cross-contamination.
Beginner tip: Wash microfiber towels separately from other laundry, with no fabric softener.
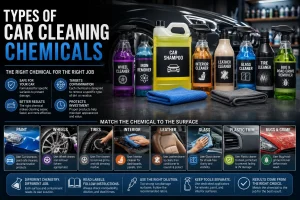
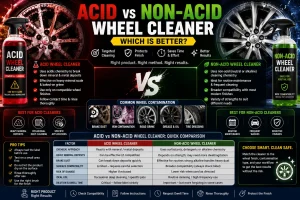
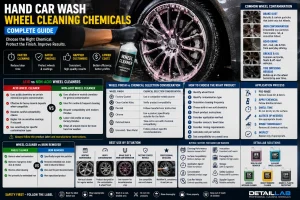
Wheel Cleaner
Purpose: Breaks down brake dust and road grime on wheel surfaces.
Benefits: Prevents baked-on buildup that’s harder to remove over time.
How to use: Spray on cool wheels, let it dwell briefly, then agitate and rinse.
Beginner tip: Always clean wheels before the rest of the car to avoid splashing dirt onto clean paint.
Wheel Brush
Purpose: Reaches into barrels, spokes, and lug areas cleaner can’t reach alone.
Benefits: Deeper clean without scratching finished wheel surfaces.
How to use: Use soft-bristle brushes for painted wheels and stiffer brushes for barrels.
Beginner tip: Keep wheel brushes separate from paint-safe brushes brake dust is abrasive.
Glass Cleaner
Purpose: Removes film, streaks, and smudges from windows and mirrors.
Benefits: Improves visibility and gives a polished finish.
How to use: Spray on a microfiber towel (not directly on glass near trim) and wipe in straight lines.
Beginner tip: Ammonia-based cleaners can damage tinted windows check the label first.
Interior Cleaner
Purpose: Cleans plastic, vinyl, and hard interior surfaces.
Benefits: Removes dust, grime, and fingerprints without leaving greasy residue.
How to use: Apply to a towel, then wipe surfaces rather than spraying directly onto electronics.
Beginner tip: Test on a hidden spot first to check for shine level and compatibility.
Leather Cleaner
Purpose: Cleans and conditions leather seats and trim.
Benefits: Prevents cracking and fading while keeping leather soft.
How to use: Apply with a soft brush or applicator, then buff with a clean towel.
Beginner tip: Condition leather every one to two months, especially in hot climates.
Dashboard Cleaner
Purpose: Cleans and protects the dashboard from sun damage.
Benefits: Reduces glare and UV fading over time.
How to use: Apply a light coat and buff to a natural, non-greasy finish.
Beginner tip: Avoid high-gloss dressings on the dash they can create windshield glare.
Clay Bar
Purpose: Removes bonded contaminants embedded in the clear coat.
Benefits: Leaves paint glass-smooth and ready for wax or sealant.
How to use: Lubricate the surface, glide the clay bar gently, and fold it often to expose a clean surface.
Beginner tip: Never use a dropped clay bar pick up dirt will scratch your paint.
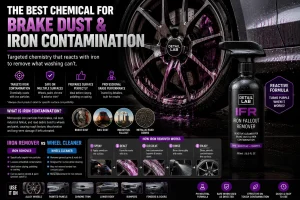
Iron Remover
Purpose: Dissolves embedded iron particles from brake dust.
Benefits: A visible purple “bleeding” reaction shows contamination lifting away.
How to use: Spray on cool paint or wheels, let it react, then rinse thoroughly.
Beginner tip: Use before claying for a deeper, safer decontamination.
Bug & Tar Remover
Purpose: Breaks down stubborn organic residue and road tar.
Benefits: Removes buildup without heavy scrubbing that risks scratches.
How to use: Spray directly on affected spots, let it dwell, then wipe gently.
Beginner tip: Treat bug splatter quickly the longer it sits, the harder it etches into paint.
Spray Wax
Purpose: Adds a quick layer of shine and light protection.
Benefits: Fast application, ideal for maintenance between full details.
How to use: Spray on a small section, then buff immediately with a microfiber towel.
Beginner tip: Great for topping off protection every few weeks without a full wax job.
Ceramic Coating Spray
Purpose: Adds a durable, hydrophobic protective layer.
Benefits: Longer-lasting shine and easier future washes.
How to use: Apply in thin, even coats on clean paint, following the product’s cure time.
Beginner tip: Work in the shade and in small sections to avoid streaking.
Tire Dressing
Purpose: Restores a rich, deep black finish to tires.
Benefits: Protects rubber from cracking and UV damage.
How to use: Apply with a foam applicator after tires are clean and dry.
Beginner tip: Wipe excess from the tread to avoid slinging product onto the paint while driving.
Quick Detailer
Purpose: A spray-and-wipe solution for light dust between washes.
Benefits: Adds shine and a touch of protection in minutes.
How to use: Mist lightly and wipe with a clean microfiber towel.
Beginner tip: Ideal for a quick refresh before a weekend drive.
Foam Applicator Pads
Purpose: Applies wax, sealant, or coating evenly.
Benefits: Controlled, streak-free application compared to using bare hands.
How to use: Load a small amount of product and work in overlapping sections.
Beginner tip: Use a different pad for each product to prevent contamination.
Vacuum Cleaner
Purpose: Removes dirt, debris, and crumbs from carpets and seats.
Benefits: A deep-clean interior finish that wiping alone can’t achieve.
How to use: Use crevice and brush attachments for seams, vents, and floor mats.
Beginner tip: A shop vac with strong suction handles pet hair and ground-in dirt better than standard home vacuums.
Detailing Brushes
Purpose: Clean tight spots like vents, badges, and door jambs.
Benefits: Reaches areas towels physically can’t access.
How to use: Use soft-bristle brushes with light pressure for delicate trim.
Beginner tip: A small set of assorted brush sizes covers nearly every interior and exterior gap.
Optional Upgrades for Professional Results
Once you’ve mastered the basics, these upgrades can push your results closer to professional-grade.
Foam Cannon
Worth buying if you wash frequently it evenly coats the car in soap, letting it dwell and loosen dirt before contact, which reduces scratch risk.
Pressure Washer
A strong upgrade for anyone serious about safe washing. Higher water pressure rinses more grit away before you ever touch the paint with a mitt.
Dual Action Polisher
Worth it once you’re ready to remove swirl marks and light scratches. It’s beginner-friendly compared to rotary polishers and works well with polishing pads and compound.
Paint Thickness Gauge
Useful mainly for enthusiasts or anyone buying a used car it measures clear coat thickness to confirm how much correction the paint can safely handle.
Inspection Light
Helpful for spotting swirl marks and missed contamination that’s invisible under regular lighting. A good investment before any polishing work.
Steam Cleaner
Best for interior deep cleaning sanitizes seats, vents, and carpets without soaking materials in liquid cleaner.
How to Build Your DIY Car Detailing Kit on Any Budget
Basic DIY Kit
- Car shampoo
- Wash mitt
- Two buckets with grit guards
- Microfiber towels (3–4)
- Glass cleaner
- Quick detailer
- Spray wax
Mid-Range DIY Kit
Everything in the Basic Kit, plus:
- Wheel cleaner and wheel brush
- Clay bar
- Interior and leather cleaner
- Tire dressing
- Foam applicator pads
- Detailing brushes
Premium DIY Kit
Everything in the Mid-Range Kit, plus:
- Iron remover
- Bug and tar remover
- Ceramic coating spray
- Foam cannon
- Dual action polisher
- Inspection light
Step-by-Step DIY Auto Detailing Process
- Pre-rinse the entire vehicle to remove loose dirt before any contact.
- Clean the wheels first with wheel cleaner and a wheel brush to avoid splashing grime onto clean paint later.
- Apply a foam wash (or thick shampoo lather) and let it dwell to loosen dirt.
- Hand wash using the two-bucket method, working top to bottom in straight lines.
- Dry the car with a clean microfiber or waffle-weave drying towel.
- Clay bar the paint to remove bonded contaminants for a smooth surface.
- Decontaminate with iron remover if brake dust or rail dust is present.
- Apply spray wax, sealant, or ceramic coating for protection and shine.
- Clean the interior — vacuum, wipe surfaces, and condition leather.
- Clean the glass inside and out for a streak-free finish.
- Apply tire dressing for a finished, uniform look.
- Do a final inspection in good lighting to catch any missed spots.
Common DIY Car Detailing Mistakes
- Using household detergents like dish soap, which strip wax and dry out seals.
- Washing in direct sunlight, which causes soap and water to dry too fast and leave spots.
- Reusing dirty microfiber towels without washing them between details.
- Skipping paint protection, leaving the clear coat exposed to sun and contaminants.
- Applying too much product, which wastes money and can leave residue.
- Using one towel for every surface, spreading grit from wheels onto paint.
- Neglecting wheel cleaning, letting brake dust bake on and become harder to remove.
- Incorrect drying methods, like air-drying or using rough towels that cause swirl marks.
DIY Car Detailing vs Professional Detailing
| Factor | DIY Detailing | Professional Detailing |
| Cost | Lower upfront, cheaper long-term | Higher per visit |
| Equipment | You buy and own it | Provided by the shop |
| Skill Level | Beginner to intermediate | Expert-level |
| Time Required | 2–4 hours, self-paced | 1–3 hours, done for you |
| Paint Protection | Good with consistent care | Excellent, often includes correction |
| Results | Very good with practice | Consistently excellent |
| Long-Term Value | High — kit pays for itself | Ongoing cost each visit |
| Best User | Hands-on owners, budget-conscious drivers | Time-strapped owners, severe paint correction needs |
How to Maintain Your DIY Detailing Kit
- Clean microfiber towels after every use in a gentle cycle with no fabric softener.
- Wash brushes with warm water and mild soap, then air dry fully.
- Store chemicals correctly — upright, out of direct sunlight, and away from freezing temperatures.
- Replace worn tools like flattened wash mitts or fraying towels before they scratch paint.
- Organize supplies in a caddy or bin so everything’s ready to grab.
- Check product shelf life periodically — some formulas separate or lose effectiveness over time.
Frequently Asked Questions
What do I need for DIY car detailing?
At minimum, you need car shampoo, a wash mitt, two buckets, microfiber towels, glass cleaner, and a wax or sealant for protection.
Can beginners do DIY auto detailing?
Yes. Basic washing, drying, and waxing are beginner-friendly. More advanced steps like polishing take practice.
How much does a DIY detailing kit cost?
A basic kit typically costs less than one professional detailing session, with mid-range and premium kits scaling up from there.
What products should every DIY kit include?
Shampoo, a wash mitt, two buckets, microfiber towels, glass cleaner, and spray wax are the non-negotiables.
Is DIY detailing as good as professional detailing?
For regular maintenance, yes. For heavy paint correction or severe damage, a professional’s experience and equipment still have an edge.
How often should I detail my car at home?
A full detail every four to six weeks works well for most drivers, with quick maintenance washes in between.
Can I apply ceramic coating myself?
Yes, consumer-grade ceramic coating sprays are designed for DIY application, though they require clean, prepped paint for best results.
Do I need a foam cannon to wash my car properly?
No, but it makes the process faster and gentler on paint by reducing direct contact needed to loosen dirt.
What’s the safest way to dry a car without scratching it?
Use a clean, dedicated drying towel and blot or gently drag it across the surface instead of rubbing.
How long does a clay bar treatment last?
Most vehicles only need claying every few months, depending on driving conditions and environment.
Is it okay to wash my car in the sun?
No washing in direct sunlight causes water spots and makes soap dry before you can rinse it off.
What’s the difference between wax and ceramic coating?
Wax offers shorter-term shine and protection, while ceramic coating lasts significantly longer and adds stronger resistance to contaminants.
Conclusion
Building a DIY car detailing kit is one of the smartest investments a vehicle owner can make. It pays for itself quickly, gives you full control over your car’s care, and helps you avoid the recurring cost of professional visits.
Start with the essentials, follow the correct step-by-step process, and upgrade your detailing supplies as your skills and needs grow. With the right detailing tools and a little practice, professional-quality results are well within reach right in your own driveway.
Key Takeaways Box
- A DIY car detailing kit typically costs less than one professional detailing visit.
- The essentials are shampoo, a wash mitt, two buckets, microfiber towels, glass cleaner, and wax.
- The two-bucket method is one of the most effective ways to prevent swirl marks.
- Clay bar treatment and iron remover prepare paint for long-lasting protection.
- Ceramic coating sprays are DIY-friendly and extend protection well beyond traditional wax.
- Consistent maintenance of your tools extends their life and protects your paint.
Pro Tips Box
- Always work in the shade, never direct sunlight.
- Wash from top to bottom to avoid dragging heavy dirt upward.
- Use a separate towel for wheels, glass, and paint.
- Let products dwell per label instructions — don’t rush the process.
- Fold your clay bar often to always work with a clean surface.
- Inspect your work under bright, direct light before calling it done.
DIY Car Detailing Shopping Checklist
- [ ] Car shampoo
- [ ] Wash mitt
- [ ] Two wash buckets with grit guards
- [ ] Microfiber towels (multiple, labeled by use)
- [ ] Wheel cleaner
- [ ] Wheel brush
- [ ] Glass cleaner
- [ ] Interior cleaner
- [ ] Leather cleaner
- [ ] Dashboard cleaner
- [ ] Clay bar
- [ ] Iron remover
- [ ] Bug and tar remover
- [ ] Spray wax or ceramic coating spray
- [ ] Tire dressing
- [ ] Quick detailer
- [ ] Foam applicator pads
- [ ] Vacuum cleaner
- [ ] Detailing brushes
Budget Comparison Table
| Kit Level | Includes | Best For |
| Basic | Shampoo, wash mitt, buckets, towels, glass cleaner, spray wax | First-time detailers, tight budgets |
| Mid-Range | Basic Kit + wheel cleaner, clay bar, interior/leather cleaner, tire dressing | Regular DIY maintenance |
| Premium | Mid-Range Kit + iron remover, ceramic coating, foam cannon, polisher | Enthusiasts chasing professional-level results |
Step-by-Step DIY Detailing Checklist
- [ ] Pre-rinse the vehicle
- [ ] Clean wheels first
- [ ] Foam wash
- [ ] Two-bucket hand wash
- [ ] Dry with a clean towel
- [ ] Clay bar treatment
- [ ] Iron remover decontamination
- [ ] Apply wax, sealant, or ceramic coating
- [ ] Clean the interior
- [ ] Clean the glass
- [ ] Apply tire dressing
- [ ] Final inspection under good lighting