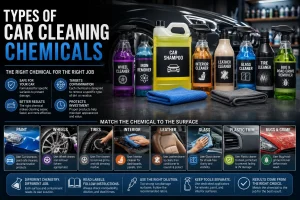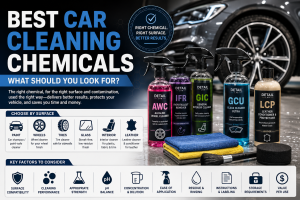

Car detailing is more than a quick wash on a Sunday afternoon. It is a system of steps, tools, and products working together to protect paint, restore interiors, and keep every surface looking its best. Whether you detail your own car in the driveway or run a professional bay, having a clear set of ideas to follow makes the process faster and the results more consistent.
This guide walks through detailing ideas for every part of a vehicle, from the paintwork down to the door jambs, along with the tools and habits that separate an average wash from a true detail.
Why a Proper Detailing Routine Matters
A consistent detailing routine does three things. It protects the paint from swirl marks, water spots, and UV fading. It preserves resale value by keeping the interior and exterior in near-original condition. And it extends the life of rubber, leather, and plastic trim that would otherwise dry out and crack over time.
Skipping steps or using the wrong products, such as dish soap on paint, can strip wax layers and leave surfaces more exposed to contamination. A methodical approach avoids this.
Build a Detailing Kit That Covers the Basics
Before jumping into techniques, it helps to have the right supplies on hand.
- A pH-balanced car shampoo instead of household soap
- Two buckets, one for soapy water and one for rinsing, each fitted with a grit guard
- Separate wash mitts for paint and for wheels, since wheels carry brake dust and heavier grime
- Microfiber towels in different colors for glass, paint, and interior tasks
- A soft-bristle wheel brush that reaches into spokes and grilles
- A quality vacuum with narrow attachments for seats and door pockets
- Clay bar or clay mitt for removing bonded surface contaminants
- Wax, sealant, or a ceramic coating for long-term paint protection
Car detailing companies such as Detail Lab design cleaning chemicals and detailing tools around this exact workflow, which is worth knowing if you would rather buy a tested kit than piece one together from scratch.
Exterior Detailing Ideas
Wash from the Top Down
Dirt and road grime settle near the bottom of a car. Washing from the roof down keeps your wash water cleaner for longer and reduces the risk of dragging heavy grit across the paint. Dry the same way, working top to bottom with a clean microfiber towel or a dedicated blower.
Decontaminate Before You Polish
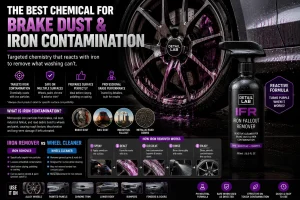
Even after a wash, paint often holds embedded iron particles, tar, and tree sap that a mitt cannot lift. An iron fallout remover followed by a clay bar treatment leaves the surface smooth to the touch. This step matters because polishing over contaminated paint can grind particles into the clear coat instead of removing them.
Correct, Then Protect
Paint correction uses a polish and a machine or hand pad to reduce swirl marks and light scratches. Once the surface looks even, apply a wax, paint sealant, or ceramic coating. Wax gives a warm, deep shine but needs reapplication every few weeks. Sealants and ceramic coatings last longer and offer stronger resistance to UV rays and water spotting.
Give the Wheels and Tires Attention
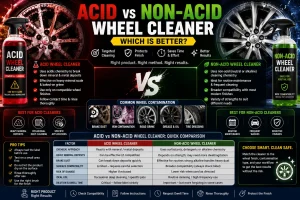
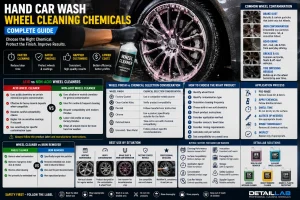
Wheels collect brake dust, road salt, and tar, which makes them one of the dirtiest areas of any vehicle. Use a dedicated wheel cleaner and brush set, rinse wheels individually rather than all at once, and finish with a tire dressing for a clean, non-greasy look. Wipe away excess dressing so it does not sling onto the paint once you drive off.
Do Not Skip the Glass
Streak-free glass changes how the whole car looks. Use a dedicated glass cleaner and a separate microfiber towel, and clean both the inside and outside of every window. An oil film remover works well on windshields that have picked up a hazy residue from wipers and traffic film over time.
Interior Detailing Ideas
Vacuum in Stages
Start with the seats and headliner, move to the carpets and floor mats, then finish with crevices along the console and door pockets. A crevice attachment reaches spots a standard nozzle cannot.
Treat Upholstery and Leather Differently
Fabric seats respond well to a fabric cleaner and a soft brush, worked in small sections and left to dry before use. Leather seats need a dedicated leather cleaner and conditioner to prevent the material from drying out and cracking, especially in vehicles that sit in direct sun.
Handle Odors at the Source
Spraying air freshener over a smell only masks the problem. Removing the source, whether it is a spill, food residue, or mildew, and following up with an odor eliminator gives longer-lasting results.
Wipe Down Every Hard Surface
Dashboards, door panels, cup holders, and center consoles collect dust and grime quickly. A microfiber towel with an interior-safe cleaner brings back a clean, matte finish without leaving a greasy shine that attracts more dust.
Engine Bay and Often-Missed Areas
A clean engine bay is one of the most overlooked detailing ideas, yet it protects components from corrosion and makes it easier to spot leaks early. Use a degreaser, avoid spraying water directly on electrical parts, and dress plastic covers to prevent them from fading in the sun.
Other commonly missed spots include door jambs, the trunk seal, the fuel door, and the area behind the fuel cap. These small details are often what separate a professional-looking finish from a rushed one.
Building a Maintenance Schedule
Detailing is most effective when it becomes a routine rather than a one-time event.
- Wash every one to two weeks depending on climate and driving conditions
- Vacuum and wipe interior surfaces weekly if the car is used daily
- Reapply wax or check sealant every four to six weeks
- Deep clean upholstery and carpets every three to six months
- Inspect and treat the engine bay every few months
Spacing these tasks out prevents any single session from becoming overwhelming and keeps contamination from building up between details.
DIY Detailing and Professional Detailing
DIY detailing works well for regular maintenance washing, interior vacuuming, and basic wax application. Paint correction, ceramic coating installation, and deep upholstery extraction usually benefit from professional equipment and experience, especially on vehicles with neglected or damaged paint. Many owners find a middle ground, handling weekly upkeep themselves and calling in a professional once or twice a year for a full correction and protection package.
Common Car Detailing Mistakes to Avoid
- Washing a car in direct sunlight, which causes water spots and streaks
- Using the same mitt on wheels and paint, which risks scratching the clear coat
- Applying wax or sealant over contaminated or unwashed paint
- Letting dressing or cleaner dry on trim before wiping it off
- Ignoring the interior until stains or odors set in
Frequently Asked Questions
What is the correct order for detailing a car?
Most detailers wash first, decontaminate with a clay bar or iron remover, correct the paint if needed, then apply protection such as wax or sealant. Wheels and glass are usually cleaned early, while interior work can happen before or after the exterior.
How often should a car be detailed?
A full detail every three to six months keeps most vehicles in good shape, with lighter washing and interior care happening weekly or biweekly in between.
Is ceramic coating better than wax?
Ceramic coating lasts longer and resists water and UV damage more effectively, but wax is easier to apply at home and gives a quicker refresh between coatings.
Can dish soap be used to wash a car?
Dish soap strips wax and protective coatings, so a pH-balanced car shampoo is the safer choice for regular washing.
Final Thoughts
Good car detailing ideas come down to using the right tools, following a logical order, and treating every part of the vehicle, not just the parts that are easy to reach. Whether the goal is a quick weekend refresh or a full paint correction, a consistent routine protects the car’s value and keeps it looking its best for years.