
Owning a good detailing kit doesn’t automatically guarantee professional-looking results. Car detailing is as much about technique as it is about products. Even with high-quality shampoo, microfiber towels, and wheel cleaner in hand, small mistakes in order, timing, or method can leave behind swirl marks, water spots, or streaky finishes.
Most of these mistakes aren’t caused by bad products they’re caused by avoidable habits. Beginners often rush, skip preparation steps, or use tools the wrong way without realizing the long-term effect on their paint or interior surfaces.
This guide walks through the most common car detailing mistakes people make, why they happen, what damage they can cause, and exactly how to fix and prevent each one.
If you’re new to vehicle care or want to improve your detailing routine, our Car Detailing Kit Guide is a great place to start. It explains what’s included in a typical detailing kit, how to choose the right products for your vehicle, and the proper steps to clean, protect, and maintain both the interior and exterior. Whether you’re a beginner or an experienced car enthusiast, this guide will help you achieve professional-quality results while keeping your vehicle looking its best.
Why Do People Make Mistakes During Car Detailing?
A few root causes show up again and again:
- Lack of experience — not knowing the correct order of steps or what each product is actually for.
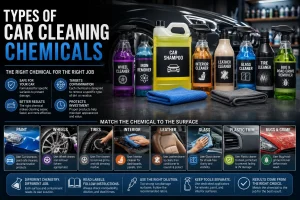
- Using the wrong product — grabbing whatever’s on hand instead of the surface-appropriate option.
- Incorrect technique — pressing too hard, rubbing instead of gliding, or skipping lubrication.
- Poor preparation — jumping straight into washing without organizing tools or checking the vehicle first.
- Rushing — trying to finish quickly instead of working through each step properly.
- Low-quality or worn-out tools — a stiff brush or a dirty towel can undo careful work in seconds.
- Not reading product instructions — skipping dilution ratios, dwell times, or surface warnings on the label.
Understanding these root causes makes it easier to catch mistakes before they happen, rather than fixing damage afterward.
Mistake #1: Using Household Cleaning Products on Your Car
The mistake: Reaching for dish soap, glass cleaner from under the kitchen sink, or general-purpose household cleaners instead of vehicle-specific products.
Why it happens: These products are already at home, and people assume “soap is soap.”
The problem: Dish soap is formulated to cut grease and often strips existing wax or sealant. Household glass cleaners can contain ammonia, which may damage tinted windows or certain interior plastics.
The fix: Switch to a pH-neutral car shampoo and an automotive-safe glass cleaner. If damage has already occurred, such as stripped protection, a fresh coat of wax or sealant usually resolves it.
Prevention: Keep vehicle-specific products in your detailing kit and store them separately from household cleaners so there’s no temptation to grab the wrong bottle.
Mistake #2: Using One Towel for Every Surface
The mistake: Using the same microfiber towel on paint, wheels, glass, and interior surfaces.
Why it happens: It feels efficient, especially when a towel still looks clean.
The problem: This spreads grit, brake dust, and chemical residue between surfaces a wheel-cleaner towel can leave residue on paint, and a paint towel can drag contamination onto glass. This cross-contamination is a common cause of light scratching.
The fix: Set aside dedicated towels for the current job and stop using a multi-surface towel immediately.
Prevention: Build a simple towel system, ideally by color: one color for paint, another for wheels, another for glass, and another for interior surfaces. Wash them separately from regular laundry, without fabric softener, which clogs microfiber.
Mistake #3: Washing the Car in Direct Sunlight
The mistake: Detailing in full sun because it’s convenient or because that’s when there’s time.
Why it happens: Weekend detailing often happens whenever the schedule allows, regardless of weather conditions.
The problem: Heat speeds up evaporation, causing soap and water to dry on the surface before you can rinse it off. This leads to water spots and can leave chemical residue behind, especially with wheel cleaners and interior products.
The fix: If you’re mid-wash and the sun is an issue, work in smaller sections and rinse more frequently.
Prevention: Detail in shade, in a garage, or during cooler parts of the day early morning or evening. If shade isn’t available, work quickly, section by section, rather than washing the whole car before rinsing.
Mistake #4: Skipping the Pre-Rinse
The mistake: Going straight to hand washing without rinsing loose dirt off first.
Why it happens: It feels like an extra, skippable step, especially on a car that doesn’t look very dirty.
The problem: Without a pre-rinse, loose grit gets picked up by your wash mitt and dragged across the paint, creating fine scratches during the wash itself.
The fix: If you’ve already started without rinsing, stop and rinse the car down before continuing.
Prevention: Always rinse the entire vehicle with a hose or pressure washer before any mitt or brush makes contact with the surface.
Mistake #5: Using Too Much Pressure While Washing
The mistake: Scrubbing hard, especially on stubborn dirt or dried spots.
Why it happens: It feels like more pressure equals better cleaning.
The problem: Excess pressure grinds trapped grit into the clear coat, contributing to swirl marks and fine scratches over time.
The fix: Switch to light, straight-line strokes and let the shampoo’s chemical action do the work rather than force.
Prevention: Use a soft, high-quality wash mitt, keep it well-lubricated with soapy water, and rinse it frequently in a separate rinse bucket to avoid dragging grit across the paint.
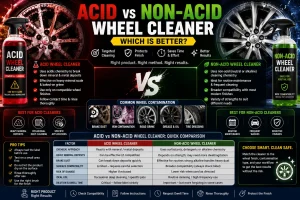
Mistake #6: Using the Wrong Car Shampoo or Chemical
The mistake: Using a product on the wrong surface, at the wrong dilution, or mixing chemicals without checking compatibility.
Why it happens: Labels get skipped, or people assume “stronger is better.”
The problem: Wrong dilution can leave residue or reduce effectiveness. Mixing incompatible chemicals can cause unwanted reactions, and letting any chemical dry on the surface can leave visible stains or spotting.
The fix: Rinse the area immediately if a chemical is left on too long, and reapply following the correct dilution afterward.
Prevention: Always check the product label for dilution ratio, dwell time, and surface compatibility before applying anything.
Mistake #7: Using Dirty Wash Mitts and Detailing Brushes
The mistake: Reusing a mitt or brush without cleaning it after the last use.
Why it happens: It’s an easy step to forget, especially at the end of a tiring wash.
The problem: Dirt and grit trapped in the fibers act like sandpaper the next time the tool touches your paint.
The fix: Rinse and wash tools thoroughly before storing them, and give a visibly dirty mitt a proper wash before its next use.
Prevention: Rinse mitts and brushes immediately after each use, wash them periodically with a gentle detergent, and let them air dry fully before storage.
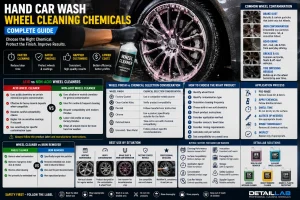
Mistake #8: Using the Same Tools for Wheels and Paint
The mistake: Grabbing the same brush or mitt used on wheels and using it later on the paint.
Why it happens: Convenience, or simply forgetting which tool was used where.
The problem: Wheels carry brake dust and road grime, including metal particles that can scratch clear coat if transferred to the paint.
The fix: If cross-contamination happens, stop and switch to a dedicated paint tool immediately.
Prevention: Keep wheel brushes, wheel cleaner, and wheel mitts completely separate from your paint-care tools ideally in a different color or clearly labeled.
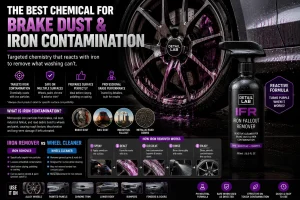
Mistake #9: Skipping Paint Decontamination
The mistake: Assuming a regular wash removes everything, and skipping iron remover or clay bar treatment entirely.
Why it happens: Decontamination isn’t always visible to the eye, so it’s easy to assume it’s unnecessary.
The problem: Bonded contaminants iron particles, tree sap, industrial fallout sit on top of the paint and cause a rough texture, and over time can affect the finish.
The fix: Run a hand over the paint after washing (with a plastic bag over your fingers for better feel). If it feels gritty rather than glass-smooth, decontamination is needed.
Prevention: Periodically use iron remover and a clay bar with proper lubrication, but don’t over-clay this step isn’t needed every wash, only when contamination has built up.
Mistake #10: Applying Too Much Product
The mistake: Overusing shampoo, interior cleaner, tire dressing, spray wax, or ceramic products, assuming more product means better results.
Why it happens: It feels thorough, and some products don’t show obvious excess right away.
The problem: Extra product often means more time removing residue, streaking, or in the case of tire dressing, sling onto paint and wheels.
The fix: Wipe away excess immediately with a clean towel, and reduce the amount used next time.
Prevention: Follow manufacturer-recommended amounts. A little product, worked in properly, almost always outperforms a heavy application.
Mistake #11: Applying Products to the Wrong Surface
The mistake: Using interior cleaner on leather without checking suitability, wheel chemicals near painted surfaces, tire dressing near brake components, or strong chemicals on delicate trim.
Why it happens: Grabbing whatever’s closest, or assuming one interior product works everywhere.
The problem: Different materials react differently leather needs its own conditioner, brake components should stay dressing-free for safety, and delicate trim can discolor with harsh chemicals.
The fix: Wipe the product off promptly and switch to the correct one for that surface.
Prevention: Check product labels for approved surfaces before applying, and keep leather, fabric, plastic, and glass products clearly separated in your kit.
Mistake #12: Drying the Car Incorrectly
The mistake: Using a dirty towel, rubbing aggressively, or leaving water sitting in mirrors, trim, and panel gaps.
Why it happens: Drying often gets rushed since the “real” cleaning already happened.
The problem: A dirty or rough towel can scratch freshly washed paint, and leftover water in gaps drips out later, causing spotting.
The fix: Re-dry any missed areas with a clean, dedicated drying towel.
Prevention: Use large, plush microfiber drying towels, blot rather than scrub, and check panel gaps, mirrors, and trim specifically before finishing.
Mistake #13: Ignoring the Interior While Focusing on Paint
The mistake: Spending most of the time on exterior paint and treating the interior as an afterthought.
Why it happens: Exterior results are more visible and satisfying to see improve.
The problem: A detailed exterior paired with a neglected interior dusty dashboard, dirty carpets, streaky glass undercuts the overall result and lets dirt and wear build up faster inside.
The fix: Set aside dedicated time for vacuuming, dashboard cleaning, seat care, carpet cleaning, glass, and door panels, not just a quick wipe-down.
Prevention: Treat interior detailing as an equal part of the process, not an optional add-on at the end.
Mistake #14: Applying Tire Dressing Incorrectly
The mistake: Applying too much dressing, letting it touch the wrong surfaces, or not wiping off excess.
Why it happens: More product looks glossier immediately after application.
The problem: Excess dressing can sling onto wheels and lower paint panels while driving, and attracts dust faster than a properly applied thin coat.
The fix: Wipe off excess with a clean applicator or towel immediately after application.
Prevention: Apply a thin, even coat using an applicator pad, and let it absorb for a minute before wiping away anything left on the surface.
Mistake #15: Attempting Paint Correction Without Proper Knowledge
The mistake: Jumping into machine polishing or compounding without understanding the difference between washing, polishing, and correction.
Why it happens: Paint correction videos make the process look simple, and beginners want faster, more dramatic results.
The problem: Using the wrong pad, compound, or technique can remove too much clear coat, potentially causing permanent damage or uneven gloss.
The fix: Stop and inspect the paint under good lighting. If unevenness has occurred, it may require professional correction to fix.
Prevention: Inspect paint condition first, start with the least aggressive pad and product combination, and avoid full correction work until you’re comfortable with the tools on a less critical panel first.
Mistake #16: Applying Ceramic Coating Without Proper Preparation
The mistake: Applying a ceramic coating over paint that hasn’t been fully cleaned, decontaminated, and inspected.
Why it happens: Coating feels like the “final step,” so prep steps sometimes get shortened to save time.
The problem: Coating over contamination, residue, or imperfections locks them in underneath the coating, making them harder to fix later.
The fix: If you notice the surface isn’t perfectly clean after applying, address it before the coating fully cures, or consult a professional if it has already set.
Prevention: Wash, decontaminate, inspect, and correct the paint if needed before ever applying a ceramic product. Follow the manufacturer’s instructions on curing time and conditions closely.
Mistake #17: Rushing the Detailing Process
The mistake: Trying to complete a full detail in a fraction of the time it actually needs.
Why it happens: Time pressure, especially on weekends or before an event.
The problem: Rushing leads to missed contamination, streaks, leftover product residue, uneven protection, and an overall inconsistent finish.
The fix: If you notice streaking or missed spots afterward, go back and address them individually rather than redoing the whole process.
Prevention: Set aside realistic time for each stage and work through the process systematically rather than trying to shortcut steps.
Mistake #18: Not Maintaining the Detailing Kit
The mistake: Letting towels, brushes, and equipment go uncleaned and unchecked between uses.
Why it happens: Kit maintenance feels like a low-priority task after a long detailing session.
The problem: Dirty towels and brushes reintroduce grit on the next use, foam cannons can clog, and expired or degraded chemicals may not perform as expected.
The fix: Set aside 10–15 minutes after each detail to clean and store tools properly.
Prevention: Wash microfiber towels regularly, rinse brushes and foam cannons after each use, store chemicals in a cool, dry place, check expiration dates periodically, and replace any tool that’s visibly worn or damaged.
Top 10 Car Cleaning Mistakes at a Glance
| Mistake | Why It Happens | Potential Problem | Better Approach |
| Using household cleaners | Convenience, already at home | Strips protection, damages surfaces | Use vehicle-specific products |
| One towel for every surface | Feels efficient | Cross-contamination, scratching | Dedicated towels per surface |
| Washing in direct sunlight | Scheduling convenience | Water spots, residue | Wash in shade or cooler hours |
| Skipping the pre-rinse | Feels like an extra step | Grit scratches paint during wash | Rinse before hand contact |
| Too much wash pressure | Assumes harder = cleaner | Swirl marks, fine scratches | Light strokes, let chemicals work |
| Wrong shampoo or chemical | Skipping labels | Residue, stains, reactions | Check dilution and compatibility |
| Dirty mitts and brushes | Forgotten after last use | Trapped grit scratches surfaces | Rinse and wash tools each use |
| Same tools for wheels and paint | Convenience | Brake dust scratches clear coat | Fully separate wheel and paint tools |
| Skipping decontamination | Contamination isn’t visible | Rough texture, dull finish | Periodic clay bar and iron remover |
| Rushing the process | Time pressure | Streaks, missed spots, residue | Work systematically, allow enough time |
How to Avoid Common Car Detailing Mistakes
Run through this checklist before you start:
☐ Check product instructions ☐ Prepare clean towels ☐ Separate wheel and paint tools ☐ Park in a suitable location ☐ Prepare chemicals at the correct dilution ☐ Inspect the vehicle before starting ☐ Work from cleanest areas to dirtier areas ☐ Keep surfaces cool, avoid direct sun ☐ Avoid overusing chemicals and dressings ☐ Perform a final inspection before finishing
What Should You Do If You Make a Detailing Mistake?
Most common mistakes are fixable at home:
- Water spots: Often removed with a quick re-wash and proper drying technique; stubborn spots may need a mild detailing spray and microfiber towel.
- Product residue: Rinse the area and re-wipe with a clean towel.
- Streaky glass: Reclean with a dedicated glass cleaner and a glass-only towel, wiping in a different direction than the last pass.
- Excess tire dressing: Wipe away with a clean applicator or towel before it has a chance to sling.
- Light contamination: Usually resolved with a clay bar and proper lubrication.
- Chemical residue: Rinse promptly and reapply the correct product at the right dilution.
Some situations are safer left to a professional visible swirl marks after aggressive polishing, uneven ceramic coating application, or any sign that clear coat has been affected. If you’re unsure whether a mistake has caused lasting damage, it’s worth getting a professional opinion before attempting further correction yourself.
Frequently Asked Questions
What are the most common car detailing mistakes?
The most frequent mistakes include using the wrong products, washing in direct sunlight, applying too much pressure, skipping the pre-rinse, and using the same towel or tools across multiple surfaces.
Can car detailing mistakes cause permanent damage?
Some can. Aggressive polishing or compounding without proper knowledge can remove too much clear coat, which may require professional correction or, in severe cases, isn’t fully reversible.
How do I prevent swirl marks when washing my car?
Use light pressure, a clean and well-lubricated wash mitt, and the two-bucket washing method, rinsing your mitt frequently to avoid dragging grit across the paint.
Why shouldn’t I use dish soap on my car?
Dish soap is designed to cut through grease and can strip existing wax or sealant, leaving the paint less protected than before.
Is it okay to wash my car in the sun?
It’s better to avoid it. Heat causes water and cleaning products to dry too quickly, which can lead to water spots and residue.
How often should I clean my detailing tools?
Rinse mitts and brushes after every use, and wash microfiber towels regularly, ideally after each detailing session.
Do I really need separate tools for wheels and paint?
Yes. Wheels carry brake dust and grime that can scratch paint if the same tool is used on both surfaces.
What happens if I apply too much tire dressing?
Excess dressing can sling onto the wheels and lower body panels while driving, and it tends to attract dust more quickly than a thin, even coat.
How do I know if my car needs paint decontamination?
Run your hand over the washed paint with a plastic bag over your fingers. If it feels gritty rather than smooth, decontamination with a clay bar is likely needed.
Should beginners attempt paint correction at home?
It’s best to start cautiously. Beginners should inspect the paint first, use the least aggressive pad and compound available, and consider practicing on a less visible panel before attempting full correction.
Can rushing really affect detailing results?
Yes. Rushing often leads to missed contamination, streaking, uneven product application, and leftover residue that a more systematic approach would have caught.
What should I do if I notice a mistake after finishing?
Address it individually rather than redoing the whole process most issues like streaks, residue, or missed spots can be corrected with a quick, targeted fix.
Conclusion
Good car detailing results come from more than just owning the right products. Correct tools, proper preparation, careful technique, and patience all play a role in avoiding the mistakes covered here. Most of these issues cross-contamination, rushed steps, incorrect product use are easy to prevent once you know what to watch for.
Following product instructions, keeping your detailing kit organized and well-maintained, and working through the process methodically will consistently produce better results than rushing through with good products alone.