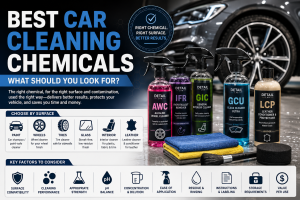

Detailing a car isn’t complicated once you understand the right order of operations. You don’t need a garage full of specialty products or a professional-grade setup. A single, well-equipped auto detailing kit can carry you from a dirty daily driver to a showroom-ready finish, as long as you follow the steps in the correct sequence.
That last part matters more than most people realize. Skipping steps, or doing them out of order, is how swirl marks, water spots, and streaky interiors happen even when someone is using good products. This guide walks through the full detailing process from start to finish, explaining exactly which tools and products from a typical car detailing kit come into play at each stage.
By the end, you’ll know how to move through an entire detail of wheels, paint, glass, and interior using the contents of one kit, in the order that protects your paint and saves you time.
If you’re new to vehicle care or want to improve your detailing routine, our Car Detailing Kit Guide is a great place to start. It explains what’s included in a typical detailing kit, how to choose the right products for your vehicle, and the proper steps to clean, protect, and maintain both the interior and exterior. Whether you’re a beginner or an experienced car enthusiast, this guide will help you achieve professional-quality results while keeping your vehicle looking its best.
What You Need Before Starting the Detailing Process
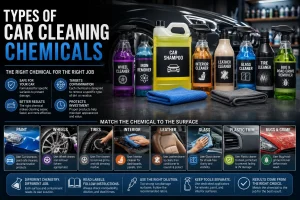
Most auto detailing kits already include the core items below. Before you begin, lay everything out so you’re not searching for supplies mid-wash with wet gloves.
A solid starting checklist includes:
- Car shampoo (pH-neutral, wash-safe)
- Wash mitt (microfiber or sheepskin)
- Two buckets with grit guards
- Microfiber towels (separate sets for exterior, interior, and glass)
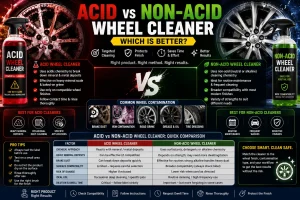
- Wheel cleaner
- Wheel brushes and tire brush
- Interior cleaner
- Glass cleaner
- Detailing brushes for vents, seams, and trim
- Vacuum
- Clay bar or clay towel
- Iron remover
- Tire dressing
- Spray wax or paint sealant
You won’t necessarily use every item in this list on every detailing job. A car that’s washed weekly may not need clay bar treatment or iron remover this time around. A newer vehicle with light dust may skip paint correction entirely. Think of this as your available toolkit the vehicle’s condition decides which tools you actually pick up.
Step 1: Prepare the Vehicle and Detailing Area
Set up before you touch a single product.
- Park in a shaded, cool area. Direct sunlight heats the paint and causes soap and water to dry too fast, leaving spots and streaks.
- Let a hot engine or hot panels cool down for a few minutes if the car just arrived from a drive.
- Remove trash, floor mats, and personal items from the interior so you’re not cleaning around clutter.
- Lay out your supplies in the order you’ll use them.
- Keep interior towels and exterior towels in separate, clearly marked piles. Cross-using them spreads grit and can scratch surfaces.
A few minutes of setup prevents backtracking later and keeps chemicals from drying where they shouldn’t.
Step 2: Clean the Wheels and Tires First
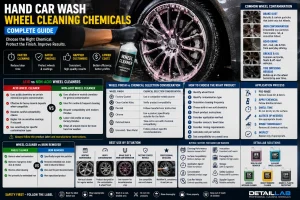
Wheels carry brake dust, road grime, and embedded contaminants some of the dirtiest surfaces on the car. Cleaning them first, before the paint, keeps that grime from splashing onto panels you’ve already washed.
- Spray wheel cleaner on one wheel at a time and let it dwell briefly.
- Use a dedicated wheel brush to work cleaner into barrels, spokes, and lug areas.
- Use a separate tire brush with tire cleaner for the rubber itself.
- Rinse each wheel fully before moving to the next.
Never use your paint wash mitt on wheels. Brake dust contains metal particles that can embed in a mitt and scratch your paint later.
Step 3: Pre-Rinse the Exterior
Once the wheels are done, rinse the entire vehicle before any cleaner touches the paint.
- A pre-rinse knocks loose dirt, dust, and grit off the surface before you make physical contact with it.
- Work from the roof down, so gravity helps carry dirt off the car rather than back onto clean areas.
- If you’re using a pressure washer, keep the nozzle at a safe distance and avoid concentrating pressure on trim edges, seals, or badges.
Skipping this step is one of the most common causes of avoidable swirl marks you end up dragging loose grit across the paint during the wash instead of rinsing it away first.
Step 4: Apply Snow Foam or Pre-Wash
A foam pre-wash adds a second layer of dirt removal before hand contact.
- Snow foam or a pre-wash spray coats the vehicle in cleaning suds that help lift dirt off the surface.
- A foam cannon attached to a pressure washer, or a simple pump sprayer, both work for this step.
- Let the foam dwell for a few minutes, but don’t let it dry on the surface that can leave residue and streaking.
- Rinse thoroughly before moving to the hand wash.
Foam alone won’t remove everything. It’s a helpful step for loosening dirt, not a replacement for the wash itself.
Step 5: Perform the Two-Bucket Hand Wash
This is the core cleaning step, and the order matters:
- Fill one bucket with wash solution (shampoo and water) and one with plain rinse water. Add grit guards to both.
- Dip your wash mitt into the soapy bucket.
- Wash the vehicle from top to bottom roof, windows, hood, upper panels, then lower panels and rocker panels last, since they’re usually dirtiest.
- Work one section at a time rather than covering the whole car in one pass.
- Before reloading soap, swirl the mitt in the rinse bucket and drag it across the grit guard to release trapped dirt.
- Use light, straight-line strokes rather than aggressive circular scrubbing.
The two-bucket method exists specifically to stop dirt from being picked up on your mitt and dragged straight back onto the paint which is exactly what happens with a single-bucket wash.
Step 6: Rinse the Vehicle Thoroughly
After washing, rinse the entire car again to remove all soap residue.
- Check panel gaps, mirrors, badges, and trim pieces where soap tends to hide.
- Leftover shampoo can dry into a hazy film if it isn’t fully rinsed.
- A final rinse with a hose nozzle set to a wide, gentle pattern helps sheet water off the surface evenly.
Step 7: Dry the Vehicle Safely
Drying is where many DIY details go wrong. Rubbing a dry towel hard against the paint can introduce fine scratches.
- Use large, clean microfiber drying towels waffle-weave or plush twist styles work well.
- Blot or drag the towel gently rather than scrubbing.
- Work top to bottom, the same direction as your wash.
- Pay attention to mirrors, badges, trim, and panel gaps where water pools and later drips out, causing spots.
If you’re working in direct sun or on a hot day, dry quickly water evaporating on its own is what causes water spots.
Step 8: Decontaminate the Paint
Not every wash needs this step, but it’s important to understand when it does.
Iron Removal
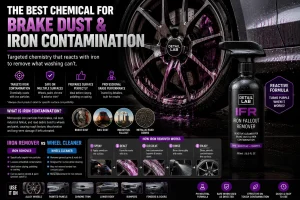
Iron contamination comes from brake dust particles that bond to the paint over time. An iron remover spray reacts with these particles (often turning purple as it works) and loosens them so they rinse away. If your car sits near brake dust-heavy conditions — city driving, frequent stop-and-go — this step is worth doing periodically.
Clay Bar Treatment
A clay bar (or clay towel) pulls embedded contaminants tree sap, industrial fallout, overspray off the paint that washing alone can’t remove.
- Always use a clay lubricant spray; never clay a dry surface.
- Glide the clay gently across a small section, keeping it lubricated the whole time.
- Fold the clay to a clean side often, since it picks up grime as it works.
- You’ll know the surface is clean when the clay glides smoothly instead of dragging or catching.
Bug and Tar Removal
For stubborn bug residue or tar spots, a dedicated bug-and-tar remover product breaks down the residue chemically. Let it dwell, then wipe gently. Avoid scraping or aggressive scrubbing, which can damage clear coat.
Decontamination isn’t needed every wash it’s typically a periodic step, done every few months depending on driving conditions.
Step 9: Inspect the Paint
With the surface clean and decontaminated, take a close look before applying any protection.
Check for:
- Swirl marks (fine circular scratches, usually visible under direct light)
- Water spots
- Oxidation or dullness
- Deeper scratches
- Any remaining contamination the clay may have missed
This inspection tells you whether the paint is ready for protection as-is, or whether it would benefit from polishing first.
Step 10: Polish or Correct the Paint When Needed
It helps to understand the difference between these three things:
- Cleaning removes dirt and surface grime.
- Polishing removes very light imperfections and restores gloss using mild abrasives.
- Paint correction is a more involved process using a dual-action polisher, cutting compounds, and finishing polishes to remove noticeable swirl marks or scratches.
If you’re using a dual-action polisher, match the pad and compound to the severity of the imperfection a cutting pad and compound for deeper marks, a finishing pad and polish for refining gloss afterward.
Paint correction is optional and not something every detail requires. If the paint looks clean and glossy after washing and decontamination, you can skip straight to protection.
Step 11: Apply Paint Protection
Once the paint is clean (and corrected, if needed), it’s time to protect it. Your kit may include one or more of these options:
Spray Wax
Quick to apply, adds gloss and short-term protection. Good for regular maintenance between deeper details.
Paint Sealant
A synthetic product that typically lasts longer than wax and offers more durable protection with moderate application effort.
Ceramic Spray
A lighter-duty version of ceramic coating, applied similarly to a spray sealant, offering improved water beading and a slicker surface feel.
Ceramic Coating
A more involved, longer-lasting protective layer that typically requires careful surface prep and curing time. It generally offers the longest protection window of the group but takes more effort and precision to apply correctly.
Each option trades off ease of application against how long the protection lasts. Choose based on how much time you want to spend and how often you’re willing to reapply.
Step 12: Clean the Interior
With the exterior finished, move inside. Follow this order:
- Remove trash and personal items.
- Vacuum seats, carpets, and floor wells.
- Remove and clean floor mats separately.
- Wipe down the dashboard.
- Clean door panels and door jambs.
- Clean the center console and cupholders.
- Clean air vents with a detailing brush.
- Clean remaining interior surfaces trim, pillars, headliner edges.
- Clean interior glass.
- Apply appropriate protection to plastic or vinyl surfaces where needed.
Match cleaners to surfaces. A general interior cleaner works for plastic and vinyl, but leather and fabric need their own dedicated products, covered next.
Step 13: Detail Seats, Leather, Fabric, and Carpets
Leather Seats
Clean with a leather-specific cleaner and a soft brush or microfiber towel to lift dirt from the grain without saturating it. Follow with a leather conditioner to prevent cracking and keep the material supple.
Fabric Seats
Use a fabric-safe interior cleaner and a soft brush to work the product into the material, then wipe with a clean microfiber towel. Spot-clean stains before they set rather than soaking the whole seat.
Carpets and Floor Mats
Vacuum thoroughly first, including under seats, then spot-clean any stains with a fabric or carpet cleaner. Let carpets dry fully before returning mats or closing doors, since trapped moisture leads to odor.
In all three cases, avoid over-wetting. Excess moisture on interior materials can lead to mildew, odor, and longer-term damage to the material or the padding underneath.
Step 14: Clean the Glass and Mirrors
- Use a dedicated glass cleaner avoid ammonia-based formulas if your car has tinted windows.
- Use a separate microfiber towel reserved only for glass, since towels used on other surfaces can leave residue that smears.
- Clean inside and outside separately, and wipe in different directions on each side (for example, side-to-side inside, up-and-down outside) so you can tell which side any streak is on.
- Finish mirrors last, checking from multiple angles for streaks.
Step 15: Dress the Tires and Exterior Trim
- Apply tire dressing with an applicator pad, using a thin, even coat rather than soaking the tire.
- Let it absorb for a minute, then wipe off any excess with a clean towel.
- Apply trim protectant to plastic trim pieces the same way a light, even layer.
Excess dressing or trim product can sling onto the paint or wheels as the car drives, and it also tends to attract dust faster. Less is more here.
Step 16: Perform the Final Inspection
Walk the entire vehicle one more time before calling it finished. Check:
- Paint for missed spots or remaining residue
- Wheels and wheel wells
- Tires for even dressing coverage
- Glass for streaks
- Trim for even protectant application
- Interior surfaces and vents
- Mirrors from multiple angles
- Door jambs, often overlooked
- Any lingering water spots
- Leftover product residue in seams or crevices
This final pass is where most missed spots get caught. It only takes a few minutes and makes the difference between a good detail and a great one.
Complete Car Detailing Process Checklist
☐ Prepare detailing area ☐ Clean wheels ☐ Clean tires ☐ Pre-rinse ☐ Foam/pre-wash ☐ Hand wash ☐ Rinse ☐ Dry ☐ Decontaminate paint ☐ Inspect paint ☐ Polish if needed ☐ Apply protection ☐ Vacuum interior ☐ Clean interior surfaces ☐ Clean seats and carpets ☐ Clean glass ☐ Dress tires ☐ Final inspection
How Long Does a Complete Car Detailing Process Take?
Timing depends heavily on vehicle size, condition, and how many steps you’re doing.
- Basic wash and dry (small car): 30–45 minutes
- Basic wash and dry (SUV or truck): 45–75 minutes
- Full detail with decontamination and interior (small car): 3–5 hours
- Full detail with decontamination and interior (SUV or truck): 5–7 hours
- Heavily soiled vehicle or one that hasn’t been detailed in a long time: add 1–2 hours to any of the above
- Full detail including paint correction: often a full day, since correction alone can take several hours
Experience speeds things up considerably. A first-time detail almost always takes longer than a fifth or sixth one, simply because you’re still learning your own workflow and your car’s specific trouble spots.
Common Mistakes During the Detailing Process
- Washing the paint before the wheels, which spreads brake dust onto clean panels
- Using a dirty or reused towel that drags grit across the surface
- Washing in direct sunlight, causing products to dry too fast
- Letting foam, cleaner, or shampoo dry on the surface before rinsing
- Using excessive pressure while washing or drying
- Skipping decontamination when the paint clearly needs it
- Applying too much tire dressing or trim protectant
- Using the wrong chemical on the wrong surface for example, an all-purpose cleaner on leather
- Performing paint correction when it isn’t actually needed, which removes clear coat unnecessarily
How Often Should You Repeat the Detailing Process?
Frequency depends on how the vehicle is used and where it’s parked.
- Daily drivers: Regular washing every 1–2 weeks, with a fuller maintenance detail monthly.
- Family vehicles: Interior cleaning more frequently due to daily use, exterior wash every 1–2 weeks.
- Luxury cars: Often detailed more carefully and frequently to preserve paint condition and resale value.
- Weekend or garage-kept vehicles: Full details can be spaced out further, sometimes every 4–8 weeks, since exposure is limited.
- Vehicles exposed to harsh weather, road salt, or heavy sun: More frequent washing and protection reapplication to prevent long-term damage.
It also helps to separate these categories:
- Regular washing — exterior wash and dry, done often
- Maintenance detailing — wash, quick interior clean, and reapplying spray wax or sealant
- Full detailing — the complete process outlined above, done periodically
- Paint correction — an occasional, deeper step done only when swirl marks or scratches have visibly built up
Frequently Asked Questions
What’s included in a basic auto detailing kit?
A basic kit typically includes car shampoo, a wash mitt, microfiber towels, wheel cleaner, glass cleaner, interior cleaner, and sometimes a clay bar or spray wax. Kits vary, so check the exact contents before assuming a step is covered.
Do I need a pressure washer to use a car detailing kit?
No. A regular garden hose works fine for rinsing and washing. A pressure washer speeds up the pre-rinse and foam steps, but it’s not required to complete the process.
Why should I wash the wheels before the paint?
Wheels carry brake dust and road grime that can splash onto clean panels if washed last. Cleaning them first prevents that contamination from reaching the paint.
Is a clay bar necessary for every detail?
No. Clay treatment is only needed when the paint has embedded contaminants that washing alone doesn’t remove. Many vehicles only need this every few months.
Can I use dish soap instead of car shampoo?
It’s not recommended. Dish soap can strip existing wax or sealant and is harsher than pH-neutral car shampoo formulated for painted surfaces.
What’s the difference between wax and ceramic coating?
Wax is easier to apply and offers shorter-term protection, usually a few weeks to a couple of months. Ceramic coating takes more effort to apply but generally lasts significantly longer.
How do I know if my car needs paint correction?
If you see visible swirl marks, scratches, or dullness under direct light after washing, correction may help. If the paint looks clean and glossy, correction usually isn’t necessary.
What order should I clean the interior in?
Start by removing trash, then vacuum before wiping surfaces, so dust knocked loose during vacuuming doesn’t resettle on freshly cleaned panels. Clean glass last.
Can I use an all-purpose cleaner on leather seats?
It’s better to use a leather-specific cleaner and conditioner. All-purpose cleaners can dry out leather over time and affect its finish.
How long does a full detail take for an SUV?
A full detail on an SUV, including decontamination and interior cleaning, typically takes 5–7 hours, longer if paint correction is involved.
How often should I reapply tire dressing?
Most tire dressings last 1–2 weeks under normal driving conditions, though this varies by product and weather exposure.
Do I need separate towels for the interior and exterior?
Yes. Using the same towel across both can transfer grit from the exterior onto interior surfaces, or interior residue onto the paint.
Conclusion
A complete, professional-looking detail doesn’t require a dozen different product lines it requires the right products, used in the right order, with attention to technique at each stage. Starting with the wheels, moving through a proper pre-rinse and two-bucket wash, decontaminating and protecting the paint, and finishing with a thorough interior clean covers everything a full detail needs.
Consistency matters as much as any single step. Sticking to a regular washing and maintenance schedule, and reserving full details and paint correction for when they’re actually needed, keeps a vehicle looking its best without unnecessary wear on the paint.
A well-organized car detailing kit makes this entire process easier to manage, since the tools and products you need at each stage are already on hand instead of scattered across the garage.