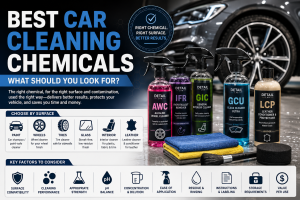

Knowing how to detail a car only gets you halfway there. Without the right products, even the best technique won’t deliver a showroom-quality finish. A complete car detailing kit is what turns effort into results.
The right tools protect your paint from scratches, your interior from wear, and your time from being wasted on products that don’t perform. In this guide, you’ll learn exactly what belongs in a well-rounded detailing kit, from cleaning chemicals to protection products, so you can build a setup that matches your vehicle and your budget.
Want to build the perfect car care routine? Read our Car Detailing Kit Guide to learn what a complete detailing kit should include, how to choose the right products, and the best techniques for cleaning, protecting, and maintaining your vehicle’s interior and exterior for long-lasting, showroom-quality results.
What Makes a Complete Car Detailing Kit?
A complete car detailing kit is a curated set of chemicals and tools designed to clean, restore, and protect a vehicle’s interior and exterior. It goes beyond a basic wash, covering everything from paint decontamination to leather conditioning.
Purpose: Each product in a detailing kit serves a specific role no single item does everything, which is why a full kit outperforms a single all-purpose cleaner.
Essential vs optional products: Essentials include shampoo, microfiber towels, a wash mitt, and basic protection like wax or sealant. Optional additions include ceramic coating sprays, dual action polishers, and engine bay cleaners for more advanced routines.
Why quality matters: Cheap towels can trap grit and scratch paint, while weak chemicals fail to lift contaminants properly. Investing in quality supplies reduces the risk of damage and delivers more consistent, longer-lasting results.
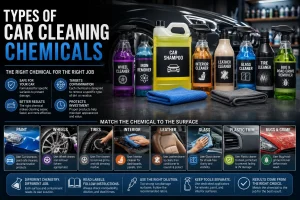
Essential Cleaning Chemicals
Car Shampoo
Car shampoo is a pH-balanced formula that lifts dirt without stripping existing wax or sealant.
Purpose: Provides the foundational wash step for every detailing session.
Benefits: Cleans safely without damaging clear coat or existing protection.
How to use: Mix with water in a bucket, apply with a wash mitt using straight-line motions, then rinse thoroughly.
When to use: Every wash, before any deeper detailing steps.
Tips for beginners: Choose a shampoo labeled “pH-neutral” or “wax-safe” to avoid stripping protection layers prematurely.
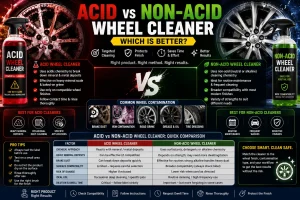
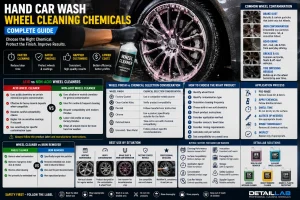
Wheel Cleaner
Wheel cleaner targets brake dust, road grime, and embedded contaminants on rims.
Purpose: Breaks down baked-on brake dust that shampoo can’t remove.
Benefits: Restores wheel shine and prevents corrosive brake dust from etching the finish.
How to use: Spray onto cool wheels, let it dwell briefly, then agitate with a wheel brush and rinse.
When to use: Every wash, ideally before washing the rest of the car to avoid dirty runoff on clean paint.
Tips for beginners: Always clean wheels first, since they carry the most contamination of any exterior surface.
Tire Cleaner
Tire cleaner removes browning and grime from tire sidewalls.
Purpose: Prepares tires for dressing by stripping old residue and buildup.
Benefits: Restores a clean, uniform look to sidewalls.
How to use: Spray on, scrub with a dedicated tire brush, then rinse.
When to use: Before applying tire dressing, typically during the wheel cleaning step.
Tips for beginners: Use a separate brush for tires to avoid cross-contaminating wheel or paint brushes.
Glass Cleaner
Glass cleaner delivers a streak-free finish on windows, mirrors, and windshields.
Purpose: Removes road film, fingerprints, and haze without leaving residue.
Benefits: Improves visibility and finishes the exterior detail with a polished look.
How to use: Spray onto a microfiber towel rather than directly on glass to prevent overspray onto trim, then wipe in straight lines.
When to use: As one of the final exterior steps, after paint work is complete.
Tips for beginners: Choose an ammonia-free formula if your car has tinted windows.
Interior Cleaner
An all-purpose interior cleaner tackles dust, dirt, and light stains across cabin surfaces.
Purpose: Provides a safe, general-use option for fabric, plastic, and vinyl.
Benefits: Simplifies interior cleaning without needing a separate product for every surface.
How to use: Spray onto a microfiber towel or directly onto the surface, then wipe clean.
When to use: During routine interior maintenance or before deeper conditioning steps.
Tips for beginners: Test on a hidden area first, especially with colored or delicate fabrics.
Leather Cleaner
Leather cleaner lifts body oils, dirt, and grime from leather seats without drying the material.
Purpose: Cleans leather in preparation for conditioning.
Benefits: Prevents cracking and fading caused by dirt buildup and UV exposure.
How to use: Apply with a soft brush or microfiber applicator, work into the leather, then wipe away residue.
When to use: Every few weeks, or more often in high-use vehicles.
Tips for beginners: Always follow leather cleaner with a conditioner to replace lost moisture.
Plastic & Vinyl Cleaner
This cleaner restores faded, sun-damaged plastic and vinyl trim inside and out.
Purpose: Removes UV buildup and restores a natural, non-greasy finish.
Benefits: Prevents the grayish fading common on dashboards and exterior trim.
How to use: Apply with a microfiber applicator and buff to the desired finish level.
When to use: Monthly, or whenever trim starts looking dull.
Tips for beginners: Avoid overly glossy formulas on dashboards, since they can create glare on the windshield.
Engine Bay Cleaner
Engine bay cleaner degreases and cleans the engine compartment safely.
Purpose: Removes oil, grease, and road grime from engine components.
Benefits: Makes leaks easier to spot and keeps the engine bay presentable for resale or shows.
How to use: Apply to a cool engine, let it dwell, agitate with a brush, then rinse with low water pressure.
When to use: A few times a year, or before selling the vehicle.
Tips for beginners: Cover sensitive electrical components before spraying, and never clean a hot engine.
Essential Detailing Tools
Microfiber Towels
Microfiber towels are soft, lint-free cloths used for washing, drying, buffing, and applying chemicals.
Function: Lifts and holds dirt without scratching paint, unlike cotton or terry cloth.
Why it’s important: Different towel types (plush, waffle-weave, edgeless) serve different jobs, from drying to polishing.
Best practices: Use color-coded towels for different tasks to avoid cross-contamination.
Common mistakes: Using the same towel on wheels and paint, which can transfer brake dust and cause scratches.
Wash Mitt
A wash mitt made from microfiber or lambswool lifts dirt away from the paint surface.
Function: Reduces the risk of swirl marks compared to sponges, which trap grit against the surface.
Why it’s important: Directly affects paint safety during the most frequent step of car care.
Best practices: Rinse the mitt frequently in a grit guard bucket during use.
Common mistakes: Dropping the mitt on the ground and reusing it without rinsing off debris.
Detailing Brushes
Detailing brushes come in various sizes for cleaning vents, seams, badges, and tight interior spaces.
Function: Reaches areas towels and cloths can’t access.
Why it’s important: Prevents dust and grime buildup in crevices that affect overall cleanliness.
Best practices: Use soft-bristle brushes for delicate surfaces and firmer brushes for carpets.
Common mistakes: Using stiff-bristle brushes on soft plastics, which can cause fine scratching.
Wheel Brush
A wheel brush is designed to reach into spokes, barrels, and lug nuts.
Function: Agitates wheel cleaner to lift embedded brake dust.
Why it’s important: Wheels accumulate more contamination than any other exterior surface.
Best practices: Choose a brush with a long handle to safely reach inside wheel wells.
Common mistakes: Using a paint-safe mitt on wheels, which can trap metal particles and later scratch the paint.
Drying Towels
Large, absorbent drying towels remove water quickly after a rinse.
Function: Prevents water spots by soaking up moisture before it evaporates.
Why it’s important: Water spots can etch into paint if left to air dry, especially in direct sunlight.
Best practices: Blot rather than drag the towel across the surface to avoid marring.
Common mistakes: Using a small or thin towel that requires excessive wiping.
Foam Cannon
A foam cannon attaches to a pressure washer and coats the car in thick, clinging foam.
Function: Loosens dirt before physical contact, reducing the risk of scratches.
Why it’s important: Adds a safer pre-wash step, especially for heavily soiled vehicles.
Best practices: Let the foam dwell for a few minutes before rinsing.
Common mistakes: Skipping the rinse step and going straight to hand washing while foam still holds loosened dirt.
Foam Sprayer
A foam sprayer is a pump-based alternative to a foam cannon for those without a pressure washer.
Function: Applies foam pre-wash using a manual pump instead of water pressure.
Why it’s important: Makes foam pre-washing accessible without specialized equipment.
Best practices: Use consistent pumping pressure for even foam coverage.
Common mistakes: Overfilling the reservoir, which can affect spray consistency.
Vacuum Cleaner
A vacuum removes dust, debris, and crumbs from carpets, seats, and mats.
Function: Handles loose interior debris before wet cleaning steps.
Why it’s important: Wet cleaning over loose dirt can grind particles into fabric.
Best practices: Vacuum before applying any interior cleaner or conditioner.
Common mistakes: Skipping crevice attachments, leaving debris in seams and door pockets.
Buckets
Wash buckets hold soapy water and rinse water separately during the two-bucket method.
Function: Keeps the wash mitt clean between paint contact points.
Why it’s important: Reduces the amount of grit transferred back onto the paint.
Best practices: Use two buckets — one for soap, one for rinsing — every time you wash.
Common mistakes: Using a single bucket, which recontaminates the mitt with every dip.
Grit Guard
A grit guard is a plastic insert placed at the bottom of a wash bucket.
Function: Traps dirt and grit below the guard, away from the mitt.
Why it’s important: Further reduces the risk of swirl marks during washing.
Best practices: Use one grit guard per bucket for maximum effectiveness.
Common mistakes: Skipping this inexpensive tool and assuming rinsing alone is enough.
Foam Applicator Pads
Foam applicator pads are used to apply wax, sealant, or leather conditioner evenly.
Function: Spreads product in thin, controlled layers.
Why it’s important: Prevents uneven application and product waste.
Best practices: Use a dedicated pad for each product type to avoid mixing chemicals.
Common mistakes: Reusing a dirty pad, which can scratch the surface during application.
Spray Bottles
Empty, labeled spray bottles are used for diluting and applying various detailing chemicals.
Function: Allows precise application of quick detailers, interior cleaners, and diluted formulas.
Why it’s important: Keeps chemicals organized and ready for use.
Best practices: Label every bottle clearly to avoid mixing incompatible chemicals.
Common mistakes: Reusing bottles without rinsing between different products.
Paint Decontamination & Protection Products
Clay Bar
A clay bar glides across paint to pull out embedded contaminants like tar, tree sap, and industrial fallout.
Why it matters: Washing alone can’t remove bonded particles sitting on top of the clear coat.
When to use: Every few months, or when paint feels rough to the touch.
Application sequence: After washing, before polishing or applying protection.
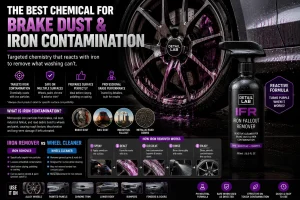
Iron Remover
Iron remover is a spray that dissolves embedded brake dust particles, often turning purple or red as it reacts.
Why it matters: Removes contamination that clay alone may not fully lift.
When to use: Before claying, especially on wheels and lower paint panels.
Application sequence: Applied after the wash, before the clay bar step.
Bug & Tar Remover
This product breaks down stubborn bug residue and tar spots that shampoo can’t dissolve.
Why it matters: Bug acids and tar can etch into paint if left untreated.
When to use: As needed, whenever bug splatter or tar spots are present.
Application sequence: Spot-treated before or during the main wash.
Paint Sealant
Paint sealant is a synthetic protective layer that bonds to the clear coat.
Why it matters: Offers longer-lasting protection than wax, typically several months per application.
When to use: After paint correction or claying, on clean, dry paint.
Application sequence: Applied before spray wax or ceramic coating for layered protection.
Spray Wax
Spray wax is a fast, easy-to-apply product that boosts shine and adds light protection.
Why it matters: Great for quick touch-ups between full detailing sessions.
When to use: Every few weeks, or after each wash for added gloss.
Application sequence: Applied last, over sealant or ceramic coating for extra shine.
Ceramic Coating Spray
Ceramic coating spray creates a durable, hydrophobic layer that resists UV damage and water spotting.
Why it matters: Offers longer protection than wax or sealant, often lasting several months.
When to use: After thorough paint correction and decontamination.
Application sequence: Applied to clean, corrected paint, then cured before exposure to water.
Paint Correction Compounds
Compounds and polishes reduce swirl marks, light scratches, and oxidation.
Why it matters: Restores clarity and depth to paint before applying any protection product.
When to use: When paint looks dull, hazy, or shows visible swirl marks under sunlight.
Application sequence: After claying, before sealant, wax, or ceramic coating.
Dual Action Polisher
A dual action polisher is a machine that applies compounds and polishes evenly and safely.
Why it matters: Delivers more consistent correction results than hand application, with less risk of burning through paint compared to rotary polishers.
When to use: During paint correction stages, paired with the appropriate pad and compound.
Application sequence: Used after decontamination, before sealant or coating application.
Interior Detailing Essentials
Dashboard: Use a plastic and vinyl cleaner followed by a low-gloss protectant to prevent UV fading and cracking.
Leather seats: Clean with a dedicated leather cleaner, then apply a conditioner to maintain flexibility and prevent cracking.
Fabric seats: Vacuum thoroughly, then treat stains with a fabric-safe interior cleaner.
Carpets: Vacuum first, then use a carpet cleaner or extractor for deeper stains and odors.
Floor mats: Remove and clean separately for a more thorough result than cleaning in place.
Door panels: Wipe down with interior cleaner, paying attention to seams and armrests where grime collects.
Center console: Use detailing brushes to reach buttons, cupholders, and storage compartments.
Touchscreens: Use a microfiber towel with a small amount of glass cleaner, avoiding direct spray on the screen.
Air vents: Use a detailing brush or vent tool to remove dust buildup that standard cleaning misses.
Maintenance tip: A monthly vacuum and wipe-down routine prevents dirt from becoming embedded in fabric and trim over time.
Exterior Detailing Essentials
Paint: Shampoo, clay bar, and sealant or ceramic coating work together to clean, decontaminate, and protect the finish long-term.
Wheels: Wheel cleaner and a wheel brush remove brake dust before it corrodes the finish.
Tires: Tire cleaner and dressing keep sidewalls looking fresh and prevent premature cracking from UV exposure.
Windows: Glass cleaner improves visibility and completes the exterior’s polished appearance.
Trim: Plastic trim cleaner restores color to faded black trim pieces around windows and bumpers.
Chrome: A dedicated chrome cleaner and polish prevent pitting and maintain reflective shine.
Plastic surfaces: Regular cleaning and UV protectant application prevent the graying and fading common on unprotected plastic.
Each of these steps contributes to long-term protection by reducing the buildup of contaminants that accelerate wear, fading, and corrosion.
Professional vs Basic Detailing Supplies
| Category | Basic Supplies | Professional Supplies |
| Tools Included | Bucket, mitt, towel | Foam cannon, dual action polisher, multiple brushes |
| Chemicals | Shampoo, basic wheel cleaner | Full range: iron remover, clay bar, sealant, ceramic coating |
| Paint Protection | Minimal or none | Sealant, ceramic coating, correction compounds |
| Durability | Shorter product lifespan | Higher-grade formulas and tools built to last |
| Ease of Use | Simple, beginner-friendly | Requires more technique and practice |
| Cost | Lower upfront investment | Higher upfront investment |
| Ideal User | New or casual car owners | Enthusiasts and professional detailers |
How to Build Your Own Car Detailing Kit
Beginner kit: Car shampoo, wash mitt, two buckets with grit guards, microfiber towels, and a basic spray wax. This covers safe, effective washing and light protection.
Intermediate kit: Add a clay bar, iron remover, wheel brush, interior cleaner, leather cleaner, and a paint sealant for deeper cleaning and longer-lasting protection.
Professional kit: Add a foam cannon, dual action polisher, correction compounds, ceramic coating spray, and specialty brushes for engine bays and tight interior spaces.
Budget priorities: Start with safe washing tools first, since poor washing technique causes more paint damage than skipping advanced products. Add protection and correction products as your budget allows.
Quick checklist:
- Car shampoo
- Wash mitt and two buckets with grit guards
- Microfiber towels (multiple types)
- Wheel cleaner and wheel brush
- Glass cleaner
- Interior and leather cleaner
- Clay bar and iron remover
- Paint sealant or wax
- Ceramic coating spray (optional upgrade)
- Dual action polisher (optional upgrade)
Common Mistakes When Buying Detailing Supplies
Buying low-quality microfiber towels: Thin or scratchy towels can mar paint instead of protecting it.
Choosing household cleaners: Dish soap strips wax and can dry out rubber seals and leather.
Skipping paint protection products: Washing without wax, sealant, or coating leaves paint vulnerable to UV and contamination.
Buying unnecessary tools: Advanced tools like polishers aren’t useful without first mastering basic washing and decontamination.
Ignoring chemical safety: Mixing incompatible chemicals or skipping ventilation can create health risks.
Purchasing poor-quality brushes: Stiff, low-grade bristles can scratch plastic, wheels, and interior trim.
How to Maintain Your Detailing Tools
Washing microfiber towels: Wash separately from other laundry, use a mild detergent, and avoid fabric softener, which reduces absorbency.
Cleaning brushes: Rinse thoroughly after each use and let them air dry to prevent chemical buildup.
Maintaining foam cannons: Flush with clean water after each use to prevent nozzle clogs from dried soap residue.
Storing chemicals: Keep bottles tightly sealed, upright, and out of direct sunlight to preserve their effectiveness.
Replacing worn accessories: Swap out mitts, pads, and brushes once bristles fray or fabric becomes matted, since worn tools can scratch paint.
Extending product life: Use only the amount needed per session — overusing chemicals doesn’t improve results and shortens how long a bottle lasts.
Frequently Asked Questions
What should every car detailing kit include?
At minimum, a detailing kit should include shampoo, a wash mitt, microfiber towels, wheel cleaner, and a basic protection product like wax or sealant.
Which detailing tools are essential?
A wash mitt, microfiber towels, two buckets with grit guards, and a wheel brush form the core toolset for safe, effective detailing.
What detailing supplies do beginners need?
Beginners should start with shampoo, a mitt, buckets, towels, and spray wax before adding specialty products like clay bars or polishers.
Are expensive detailing tools worth it?
Higher-end tools often last longer and perform more consistently, making them worthwhile for frequent detailers, though not essential for occasional use.
How long do detailing chemicals last?
Most detailing chemicals last one to three years unsealed, depending on the formula, storage conditions, and exposure to temperature extremes.
Can one detailing kit clean both the interior and exterior?
Yes, as long as the kit includes separate products designed for each surface type, since exterior chemicals aren’t always safe for interior materials.
Do I need a dual action polisher for basic detailing?
No. A polisher is useful for paint correction but isn’t necessary for routine washing and protection.
How often should I replace my microfiber towels?
Replace towels once they become thin, matted, or start leaving lint, typically after heavy use over one to two years.
Is a foam cannon necessary for a detailing kit?
It’s optional but helpful, since it reduces the risk of scratching by loosening dirt before physical contact.
What’s the difference between wax and ceramic coating?
Wax offers shorter-term shine lasting weeks, while ceramic coating provides more durable protection lasting several months.
Can I use the same cleaner on wheels and paint?
No. Wheel cleaner is formulated to break down brake dust and can be too harsh for clear-coated paint.
How do I know if my detailing kit is complete?
A complete kit should cover washing, decontamination, protection, and interior care — if any of these categories is missing, the kit has a gap.
Key Takeaways Box
- A complete car detailing kit covers cleaning, decontamination, protection, and interior care.
- Essentials include shampoo, a wash mitt, microfiber towels, wheel cleaner, and a protection product.
- Quality matters — cheap towels and weak chemicals increase the risk of scratches and poor results.
- Build your kit in stages: beginner, intermediate, then professional, based on budget and experience.
- Maintaining your tools extends their lifespan and keeps results consistent over time.
Pro Tips Box
- Always clean wheels before washing the rest of the car to avoid spreading brake dust.
- Use the two-bucket method with grit guards to reduce the risk of swirl marks.
- Color-code towels by task (glass, interior, paint) to prevent cross-contamination.
- Let clay bar and iron remover dwell as directed before agitating for best results.
- Store all chemicals upright and out of direct sunlight to preserve their shelf life.
Complete Car Detailing Kit Checklist
- [ ] Car shampoo
- [ ] Wash mitt
- [ ] Two buckets with grit guards
- [ ] Microfiber towels (wash, dry, buff, glass)
- [ ] Wheel cleaner and wheel brush
- [ ] Tire cleaner and tire dressing
- [ ] Glass cleaner
- [ ] Interior cleaner
- [ ] Leather cleaner and conditioner
- [ ] Plastic and vinyl cleaner
- [ ] Clay bar and iron remover
- [ ] Bug and tar remover
- [ ] Paint sealant or spray wax
- [ ] Ceramic coating spray (optional)
- [ ] Correction compound and dual action polisher (optional)
- [ ] Detailing brushes (assorted sizes)
- [ ] Vacuum cleaner
- [ ] Foam cannon or foam sprayer (optional)
- [ ] Spray bottles for dilution and application
Essential vs Optional Detailing Supplies
| Category | Essential | Optional |
| Cleaning | Car shampoo, wash mitt, towels | Foam cannon, foam sprayer |
| Wheels & Tires | Wheel cleaner, wheel brush, tire cleaner | Tire dressing applicator tools |
| Interior | Interior cleaner, vacuum | Fabric extractor, upholstery brush kit |
| Protection | Spray wax or sealant | Ceramic coating spray |
| Correction | — | Dual action polisher, correction compounds |
| Decontamination | — | Clay bar, iron remover |
Professional vs Beginner Kit Comparison
| Feature | Beginner Kit | Professional Kit |
| Core Tools | Mitt, buckets, towels | Full brush set, polisher, foam cannon |
| Chemicals | Shampoo, basic wax | Full decontamination and protection range |
| Paint Correction | Not included | Compounds, polisher, and pads included |
| Protection Level | Weeks (wax) | Months (sealant or ceramic coating) |
| Cost | Lower | Higher |
| Best For | New or casual owners | Enthusiasts and professional detailers |
Conclusion
A truly complete car detailing kit does more than clean it protects, restores, and preserves your vehicle’s value over time. Investing in quality chemicals and tools, from microfiber towels to paint sealants, delivers noticeably better results than relying on a single all-purpose cleaner.
Whether you’re just starting out or upgrading toward a professional-level setup, build your kit in stages: master the basics, add decontamination and protection products, then layer in correction tools as your skills grow. A well-stocked, high-quality detailing kit pays for itself in the long run through better results, less product waste, and a vehicle that holds its value.